Category: Small Space Living: Smart Ideas for Tiny Homes

Maximize every inch with clever storage, space-saving furniture, and stylish small apartment solutions.

  • Laundry Room Smells Musty? Find the Source Before You Fix Anything

    Laundry Room Smells Musty? Find the Source Before You Fix Anything

    Search this problem and every article hands you the same nine causes and the same nine fixes, then leaves you to guess which one is yours. So people clean the gasket, run a vinegar cycle, buy an air freshener, and three weeks later the smell is back, because the actual source was a damp patch behind the machine the whole time. The useful step is the one nobody writes about: find the source first. It takes about five minutes and no tools.

    Short answer: Work through the sniff test in order: open the washer door, pull out the detergent drawer, smell the drain, feel the wall and floor behind the machines, run the dryer and check the outside vent, then smell the towels and mats. Whichever step makes the smell stronger is your source. Fix that one thing rather than all nine, then leave the washer door ajar and keep the room ventilated so it does not come back.

    Disclosure: This post contains affiliate links. If you buy through them, I may earn a small commission at no extra cost to you. I only recommend pieces I would genuinely use in my own home.

    Damp towels and bath mats piled in a closed laundry hamper
    Damp towels and bath mats piled in a closed laundry hamper
    Detergent drawer pulled fully out showing residue in the housing
    Detergent drawer pulled fully out showing residue in the housing

    The 5-minute sniff test: find the source first

    Go into the room, close the door, and give your nose thirty seconds to adjust. Then work through these seven checks in order. The step where the smell gets noticeably stronger is your answer, and you can stop there.

    1. Open the washer door. If the smell jumps, it is the machine, and almost certainly the rubber gasket on a front loader. Run your finger around the underside of the seal; if it comes back grey or black, you have found it.

    2. Pull out the detergent drawer. Take it right out of the housing. Detergent and softener residue turns to sludge in there, and the cavity behind the drawer is one of the most commonly missed sources in the whole room.

    3. Smell the drain or standpipe. Get close to where the washer hose enters the wall or floor. A sewer-ish smell rather than a musty one usually means a dry or blocked trap, which is a completely different fix.

    4. Feel behind and under the machines. Slide a dry paper towel along the floor and up the wall behind the appliances. Damp paper means a slow leak, and a slow leak means the smell will keep coming back no matter what you clean.

    5. Run the dryer and check the vent outside. Weak or no airflow at the exterior vent means lint and moisture are backing up inside the ducting. This one matters beyond the smell, a blocked dryer vent is also a fire risk.

    6. Smell the fabrics. Towels, bath mats, cleaning rags, and the inside of the hamper. Textiles hold odor better than any surface in the room, and one forgotten damp bath mat can scent an entire small laundry space.

    7. If none of the above: it is the air itself. A room with no window and weak extraction simply holds moisture, and every soft surface in it eventually smells of that. This is the most common answer in small windowless laundry closets, and it is fixed with airflow rather than cleaning.

    Compact dehumidifier running beside a washing machine with a full tank
    Compact dehumidifier running beside a washing machine with a full tank

    Quiz: where is your smell coming from?

    Answer five quick questions, one at a time, and I will narrow down the likely source.

    Refillable moisture absorber tub on a laundry room shelf
    Refillable moisture absorber tub on a laundry room shelf

    Quick comparison: source, symptom, and fix

    Source How you know The fix Time
    Washer gasketSmell jumps when door opensWipe seal, hot cleaning cycle, leave door ajar20 min
    Detergent drawerSludge in or behind the drawerRemove, soak, scrub the housing too15 min
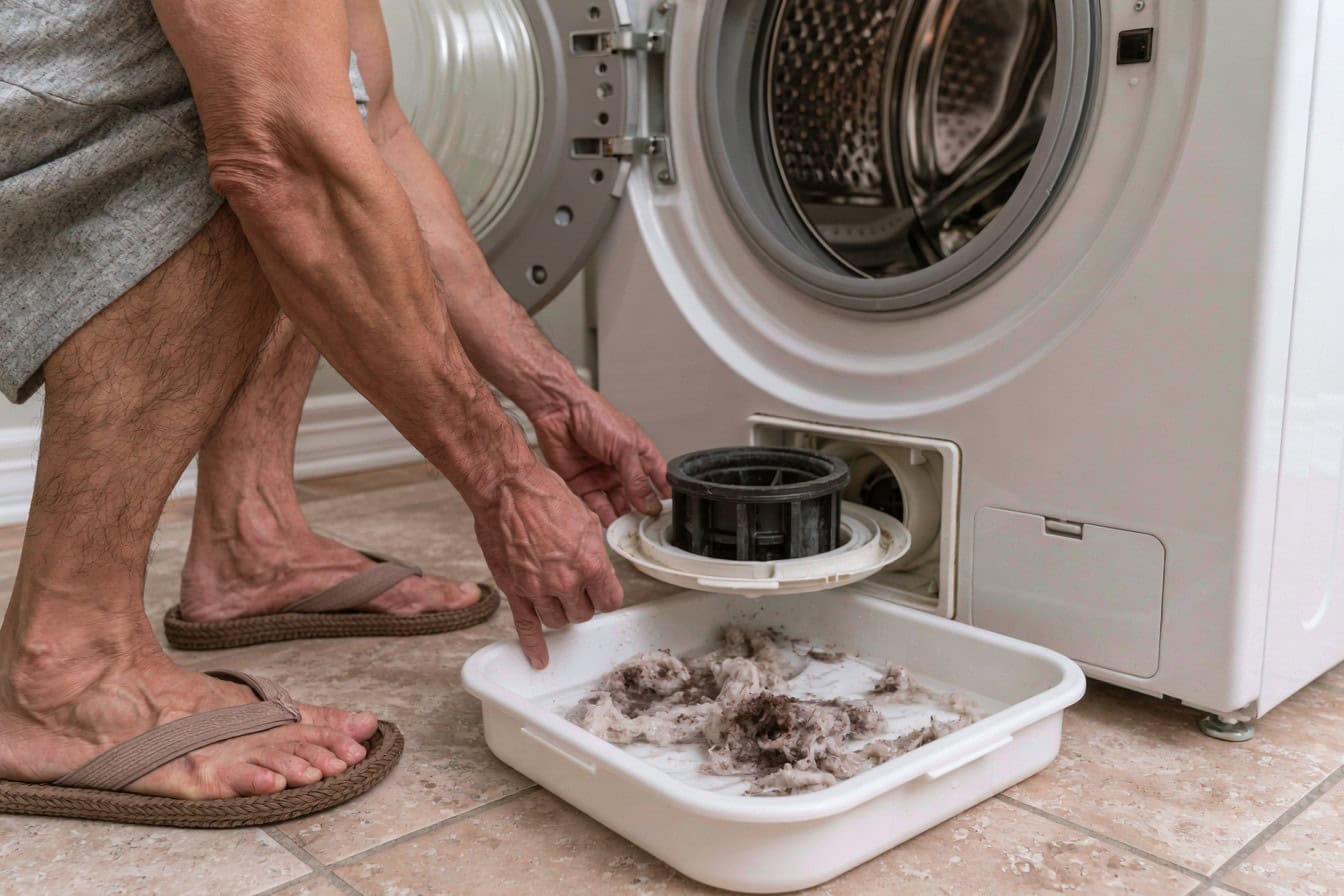
    Machine filterNever been opened, slow drainingEmpty the pump filter over a tray15 min
    Drain or trapSewer smell, not mustyRun water to refill the trap, then flush10 min
    Slow leakDamp paper towel behind machinesFind it, fix it, dry the area fullyVaries
    Blocked dryer ventWeak airflow outside, long dry timesClear the duct with a brush kit1 hour
    Damp textilesSmell is strongest at the hamperHot rewash, dry fully, air the hamper1 cycle
    Room airNo single source, smell is generalBetter extraction, dehumidifier, airflowOngoing
    Extractor fan running in a small laundry room while clothes dry
    Extractor fan running in a small laundry room while clothes dry

    The two-minute routine that keeps it away

    Once you have fixed the source, almost all of the recurrence problem comes down to four small habits. None of them takes real effort, and together they mean you will probably never do the sniff test again.

    Leave the washer door and the drawer ajar. Free, takes one second, and it is the single most effective habit on this list. A sealed damp drum is exactly the environment mold wants.

    Move laundry out promptly. A finished load left sitting overnight is a warm damp bundle in a sealed box, and it will scent both the clothes and the machine. Set a timer if you are prone to forgetting.

    Run a hot maintenance cycle monthly. Empty machine, hottest setting, with a washer cleaner or white vinegar. It clears the biofilm you cannot reach before it becomes a smell.

    Ventilate while and after you dry. If you air-dry indoors, remember a single load releases roughly two litres of water into the room. Open a window or run the fan through the whole drying period, not for five minutes afterwards.

    When to stop cleaning and call someone

    Most musty laundry rooms are a twenty minute job. A few are not, and it is worth knowing the difference before you spend a month scrubbing.

    Visible mold spreading beyond a small patch. A little around a gasket is normal and wipes off. Growth across a wall, ceiling, or under flooring is a moisture problem in the building, not a cleaning problem, and it needs proper assessment.

    The damp patch comes back after drying. That is an active leak, whether from a hose, a seal, or plumbing in the wall. Cleaning will never fix it, and the longer it runs the more it costs.

    The dryer takes much longer than it used to. Usually a blocked vent, and while a brush kit often solves it, ducting that runs a long way or through a roof is worth having cleared professionally, because this one is a genuine fire risk rather than an inconvenience.

    The smell keeps returning with no findable source. Persistent unexplained damp can point to something structural, and at that point a professional inspection costs less than another year of guessing.

    Plug in air freshener beside a washing machine, the mistake
    Plug in air freshener beside a washing machine, the mistake

    What actually helps, by source

    1. Washing machine cleaner tablets — for a smell that lives in the machine

    Time-release tablets that dissolve slowly through a hot empty cycle and lift the residue film out of the pump, drum, and hoses, which is the part you cannot reach with a cloth. These are EPA Safer Choice certified and septic safe, and they work in front loaders, top loaders, and HE machines alike.

    Worth it or skip: Worth it if the smell is already established, because vinegar cuts odor but leaves the detergent residue that keeps feeding it. Skip them if you are simply maintaining a machine that smells fine, a monthly hot cycle with white vinegar genuinely does the job for a fraction of the price.

    Check price on Amazon →

    2. A year’s supply of tablets — if you are switching to monthly maintenance

    Once you have solved a musty machine, the way to keep it solved is one cleaning cycle a month, and a bulk pack removes the excuse of having run out. Cheaper per cycle than buying six at a time and it lasts a full year.

    Check price on Amazon →

    3. A dryer vent brush kit — for weak airflow and long dry times

    Flexible rods that screw together and push a brush head through the ducting from either end. If step five of the sniff test showed weak airflow outside, this is the fix, and clearing it also cuts drying times and removes a real fire risk. Worth doing yearly whether or not there is a smell.

    Shop vent brush kits on Amazon →

    4. A compact dehumidifier — when the room itself is the problem

    If the sniff test found no single source, the answer is the air. A small dehumidifier next to the machines collects moisture into a tank rather than into your walls and soft furnishings, and in a windowless laundry closet it is the difference between a room that stays fresh and one that never quite does.

    Shop dehumidifiers on Amazon →

    5. Refillable moisture absorbers — the cheap version of the same idea

    Passive tubs of moisture-absorbing crystals that need no power and no plumbing. Less effective than a dehumidifier, but they cost a few dollars, work in cupboards where nothing else fits, and give you a visible readout of how damp your room really is.

    Shop moisture absorbers on Amazon →

    Real-life test note

    I spent about six weeks fixing the wrong thing. I wiped the gasket weekly, ran three vinegar cycles, bought a plug-in air freshener, and the smell always came back within four or five days. Then I slid a dry paper towel along the floor behind the washer and it came out wet, from a hose connection that had been weeping perhaps a teaspoon a day into the corner where nobody looks. Twenty minutes with a wrench and two days of a fan pointed at the skirting board, and the room has been fine ever since. The lesson cost me six weeks and about thirty dollars of things I did not need: check behind the machines on day one, not day forty.

    5 mistakes when your laundry room smells musty

    1. Reaching for an air freshener. It masks the smell for a few hours and removes no moisture whatsoever, which means the source keeps growing quietly behind the scent. Find the cause first; deodorize afterwards if you still want to.

    2. Fixing all nine causes at once. If you clean everything simultaneously and the smell goes, you learn nothing, and when it returns you are back to guessing. Work the sniff test, fix one thing, wait a few days.

    3. Never checking behind the machines. It is the least accessible spot and the most common hidden source. A dry paper towel along the floor and up the wall takes thirty seconds and settles the question.

    4. Closing the washer door after every load. A sealed damp drum is precisely the environment mold wants, and this single habit undoes every cleaning cycle you run. Leave the door and the drawer ajar.

    5. Ignoring a dryer that has slowed down. Longer drying times mean the duct is backing moisture up into the room, and that is a fire risk as well as a smell. Treat it as maintenance, not an inconvenience.

    Get your fix order in 3 taps

    Why the smell is really a moisture message

    That musty note is not dirt, it is biology. The characteristic smell comes largely from compounds released by mold and mildew as they grow, which is why cleaning a surface removes the smell for a while and why it returns if the damp underneath never went anywhere. Guidance from the US Environmental Protection Agency puts the principle plainly: mold needs moisture to grow, so controlling indoor moisture is how you control mold. That single sentence explains the whole sniff test. You are not hunting for a dirty thing, you are hunting for a wet thing. Find where the water is sitting, whether that is a gasket fold, a drawer housing, a slow drip behind a machine, or simply air with nowhere to go, and the smell has nothing left to live on. The EPA also notes that damp or wet materials should be dried within a day or two to prevent growth taking hold, which is exactly why the paper towel test on day one saves you weeks.

    People also ask

    Why does my laundry room smell musty?

    Because moisture is sitting somewhere it should not: in the washer gasket, the detergent drawer, the pump filter, a slow leak behind the machines, a blocked dryer vent, damp fabrics, or simply in the air of a room with no ventilation. The sniff test narrows it down in about five minutes.

    How do I get rid of a musty smell in my laundry room?

    Find the source first, then fix that one thing. Cleaning everything at once often works temporarily and teaches you nothing, so when the smell returns you are guessing again. Once fixed, leave the washer door ajar and keep the room ventilated.

    Why does my washing machine smell even after cleaning it?

    Usually because the source is not in the drum. Check the detergent drawer housing, the pump filter, and the fold under the rubber gasket, and if the machine is genuinely clean, the smell is coming from the room rather than the appliance.

    Can a musty laundry room be a sign of a bigger problem?

    Sometimes, yes. Persistent damp that returns after drying, or mold spreading beyond a small patch, points to an active leak or a building moisture issue rather than a cleaning task, and that is worth having assessed properly.

    Musty laundry room FAQ

    Does vinegar really clean a washing machine?

    For routine maintenance, yes: a hot empty cycle with white vinegar tackles odor and light residue well. For an established smell, a proper machine cleaner works better, because it removes the detergent film that keeps feeding the problem rather than only killing what is on top of it.

    How often should I clean my washing machine?

    Once a month for a hot cleaning cycle, and a quick wipe of the gasket and drawer whenever you think of it. Front loaders need this more than top loaders because of the door seal.

    Where is the pump filter, and do I really need to open it?

    Usually behind a small hatch at the front bottom of a front loader. Yes, open it, with a tray and a towel ready, because plenty of machines have never had it emptied and it is a classic hidden source.

    Will a dehumidifier fix the smell on its own?

    Only if the room air is genuinely the source. It will not help a gasket, a filter, or a leak, so run the sniff test before you buy one, or you may end up dehumidifying around an unfixed drip.

    My clothes smell musty even when the room does not. Why?

    Usually damp laundry left sitting in the drum, an overloaded machine that never rinsed properly, or towels that never dried fully. Rewash hot, dry completely, and move loads out promptly.

    Printable weekly home reset checklist beside a fresh laundry basket
    Printable weekly home reset checklist beside a fresh laundry basket

    Musty laundry room cheat sheet

    • ✔ Find the source before you fix anything, the sniff test takes 5 minutes
    • ✔ Order: door, drawer, drain, behind the machines, vent, fabrics, air
    • ✔ Dry paper towel behind the washer on day one, not day forty
    • ✔ Fix one thing, wait a few days, then judge
    • ✔ Washer door and drawer ajar between loads, always
    • ✔ Hot maintenance cycle monthly, vinegar or a cleaner tablet
    • ✔ One air-dried load puts about 2 litres of water into the room
    • ✔ Damp that returns after drying is a leak, not a cleaning job

    Want the routine to run itself?

    Grab my free Weekly Home Reset Checklist, the simple rhythm that keeps damp laundry, and everything else, from sitting around.

    Download the printable checklist →

    More laundry and small space guides

    The bottom line on a musty laundry room

    Almost everyone attacks this problem from the wrong end, cleaning nine things in the hope that one of them was it. The smell is a message about water, and the useful five minutes are the ones you spend finding out where that water is sitting. Then you fix one thing, leave the door ajar, keep the air moving, and the room stays fresh without a single air freshener.

    Personally, six weeks of scrubbing the wrong thing taught me to reach for a paper towel before a bottle of anything. Plus, a laundry room that smells of nothing at all is a quiet luxury, and it is usually about twenty minutes away once you know where to look.

    Find the water, fix one thing, then let it breathe. That is the whole job.

  • Over Washer and Dryer Shelf Ideas: How to Measure It Before You Mount It

    Over Washer and Dryer Shelf Ideas: How to Measure It Before You Mount It

    A shelf above the machines is the highest-value change you can make in a small laundry room. It gets every bottle off the appliance lids, creates the folding surface the room never had, and costs less than a takeaway. It is also the change people most often get slightly wrong, because five constraints decide where that shelf can go, and the galleries of pretty laundry rooms mention approximately none of them.

    Short answer: Mount a shelf 40 to 45 cm above a front loader, or above the fully open lid arc of a top loader, and keep it 25 to 30 cm deep so it does not crowd you. Check five things before drilling: lid clearance, access to the water valves, vibration (add a lip or rail), dryer heat rising, and whether you can still pull the machines out for service. If you cannot drill, use a freestanding over-machine unit instead.

    Disclosure: This post contains affiliate links. If you buy through them, I may earn a small commission at no extra cost to you. I only recommend pieces I would genuinely use in my own home.

    (more…)
  • Laundry Room Paint Colors: Why You Should Choose the Bulb Before the Color

    Laundry Room Paint Colors: Why You Should Choose the Bulb Before the Color

    Most laundry room color guides hand you fifteen swatches and wish you luck. The trouble is that a laundry room is almost never lit like the room in the photograph. It has one cold bulb, no window, and two enormous white appliances taking up half the wall, and a color chosen in daylight on a phone screen will look nothing like that once it is up. So this guide runs the other way round: light first, appliances second, finish third, and only then the color.

    Short answer: Change the bulb to warm white 2700K before you choose a paint color, because artificial light shifts every shade you are considering. In a windowless laundry room go either warm white or genuinely dark, and avoid the middle greys and sages that need daylight to read properly. Use a scrubbable satin or semi-gloss finish rather than matt, and test the sample on the actual wall, under the actual light, at the hour you actually do laundry.

    Disclosure: This post contains affiliate links. If you buy through them, I may earn a small commission at no extra cost to you. I only recommend pieces I would genuinely use in my own home.

    (more…)
  • Wall Mounted Drying Racks: How to Pick One That Holds, and Where to Mount It

    Wall Mounted Drying Racks: How to Pick One That Holds, and Where to Mount It

    Every guide to wall mounted drying racks lists the same seven products with the same pros and cons, and not one of them asks the question that decides whether your rack survives its first load of wet towels: what is your wall made of? A rack rated for 30 kilos is rated for 30 kilos when it is screwed into timber. Screwed into plasterboard, it is a wall repair waiting to happen. So this guide starts with the wall, adds the capacity math nobody gives you, and ends with the humidity rule that matters enormously in a small room.

    Short answer: Choose a wall mounted drying rack by wall type first: into studs you can hang almost anything, into plasterboard alone use heavy-duty toggle anchors and stay under about 10 kilos, and if you rent, use a tension or over-door rack instead. Allow roughly 5 to 7 linear metres of rod per average load, and always run ventilation while clothes dry indoors, a single wet load releases about 2 litres of water into the room.

    Disclosure: This post contains affiliate links. If you buy through them, I may earn a small commission at no extra cost to you. I only recommend pieces I would genuinely use in my own home.

    (more…)
  • How to Hide a Washer and Dryer: 9 Solutions, From Renter-Friendly to Full Build

    How to Hide a Washer and Dryer: 9 Solutions, From Renter-Friendly to Full Build

    Search this question and you get sixty beautiful solutions, roughly fifty-five of which require a carpenter. That is not much use if you rent, or if your entire budget is a hundred dollars and a free Saturday. So this guide sorts the options by the only filter that actually matters: what you are allowed to do to your home. Nine solutions across three permission levels, with real costs, plus the four hidden costs of hiding machines that no gallery mentions.

    Short answer: If you rent, hide a washer and dryer behind a curtain on a tension rod, a folding screen, or a roller blind, all under $50 and fully reversible. If you own but do not want building work, use a freestanding cabinet unit, a sliding barn door, or bifold doors. If you are renovating, integrate the machines into cabinetry with panel-ready doors. Whatever you choose, leave ventilation gaps and add anti-vibration pads.

    Disclosure: This post contains affiliate links. If you buy through them, I may earn a small commission at no extra cost to you. I only recommend pieces I would genuinely use in my own home.

    (more…)
  • Bathroom Laundry Combo Layout: 4 Plans That Actually Work in a Small Room

    Bathroom Laundry Combo Layout: 4 Plans That Actually Work in a Small Room

    Putting laundry in the bathroom is one of the smartest moves in a small home, and one of the easiest to get wrong. Search for it and you get photo galleries: beautiful rooms, no dimensions, no clearances, no mention of what two humid functions in one small room actually do to each other. This guide is the practical version. Four layouts by room shape, the measurements that decide whether your plan works, how to handle the moisture, and four ways to make the machines disappear.

    Short answer: The four layouts that work are stacked in an alcove, side by side under a counter, hidden in a closet behind doors, and the U-shape with laundry on one wall. Allow about 70 cm width and 90 cm depth per machine including hoses, plus 60 cm of clear standing space in front, and keep 20 cm of breathing room beside the toilet. Then add ventilation, because two wet functions in one small room is the mistake nobody warns you about.

    Disclosure: This post contains affiliate links. If you buy through them, I may earn a small commission at no extra cost to you. I only recommend pieces I would genuinely use in my own home.

    (more…)
  • Laundry Room Organization: The 5-Station System That Stops the Piles Coming Back

    Laundry Room Organization: The 5-Station System That Stops the Piles Coming Back

    Here is why laundry room organization keeps failing: almost every guide organizes the detergent. Beautiful jars, labeled bins, a pegboard for the clothespins, and two weeks later the room is chaos again. That is because the mess in a laundry room is not supplies, it is clothes in transit, sitting in five different stages at once with nowhere to be. Organize the flow instead of the shelf and the piles stop coming back.

    Short answer: Organize a laundry room around the five stations laundry actually passes through: dirty in, sorted, wet and waiting, clean and unfolded, and ready to leave. Give each stage a physical spot (a sorter for stages one and two, a rack for three, a surface for four, a basket per person for five), audit the supplies down to what you use weekly, and store the rest elsewhere.

    Disclosure: This post contains affiliate links. If you buy through them, I may earn a small commission at no extra cost to you. I only recommend pieces I would genuinely use in my own home.

    (more…)
  • Small Laundry Room Decor: How to Make the Least Loved Room Cozy Without Renovating

    Small Laundry Room Decor: How to Make the Least Loved Room Cozy Without Renovating

    Search for small laundry room decor and you get gallery after gallery of custom cabinetry, tiled floors, and undermount sinks, gorgeous rooms that require a contractor and a permit. Meanwhile your actual laundry space is a closet with exposed hookups, a wire shelf, and a light bulb that makes everything look like a hospital corridor. This guide is for that room. Five layers, no renovation, no landlord permission, and a weekend at most.

    Short answer: To make a small laundry room feel cozy without renovating, work in five layers: cover what is ugly (hookups, cords, machine sides), go vertical with one shelf above the washer, put a runner underfoot, warm the light and add color on one wall, then contain supplies in matching baskets and jars. Every layer is renter-friendly and the whole thing costs well under $150.

    Disclosure: This post contains affiliate links. If you buy through them, I may earn a small commission at no extra cost to you. I only recommend pieces I would genuinely use in my own home.

    (more…)
  • Floating Shelves for Small Spaces: 12 Smart Ideas

    Floating Shelves for Small Spaces: 12 Smart Ideas

    The short answer: floating shelves are one of the smartest ways to add storage and style to a small space, because they use vertical wall space instead of precious floor area. The best small-space ideas include replacing a bulky nightstand with a slim bedside shelf, stacking shelves vertically in a hallway, turning a corner into storage, and combining a shelf with a compact desk. Keep them light-colored to reflect light, follow the 60-30-10 styling rule, and always anchor into studs for safety. Below are 12 clever floating shelf ideas for small rooms, plus how to style them.

    (more…)
  • Small Bathroom Layout: 9 Smart Plans That Maximize Space

    Small Bathroom Layout: 9 Smart Plans That Maximize Space

    The short answer: a good small bathroom layout starts with the plumbing and works outward. Most small full baths are 5×7 or 5×8 feet (around 35–40 sq ft), and the trick is to line up the toilet, sink, and shower so each has clear space without crowding the door. Keep about 75 cm (30 inches) of clear floor to move, put the shower in a corner to free the center, and choose wall-mounted fixtures to save precious floor space. Get the plan right and a tiny bathroom feels twice its size. Here’s how, step by step.

    (more…)